
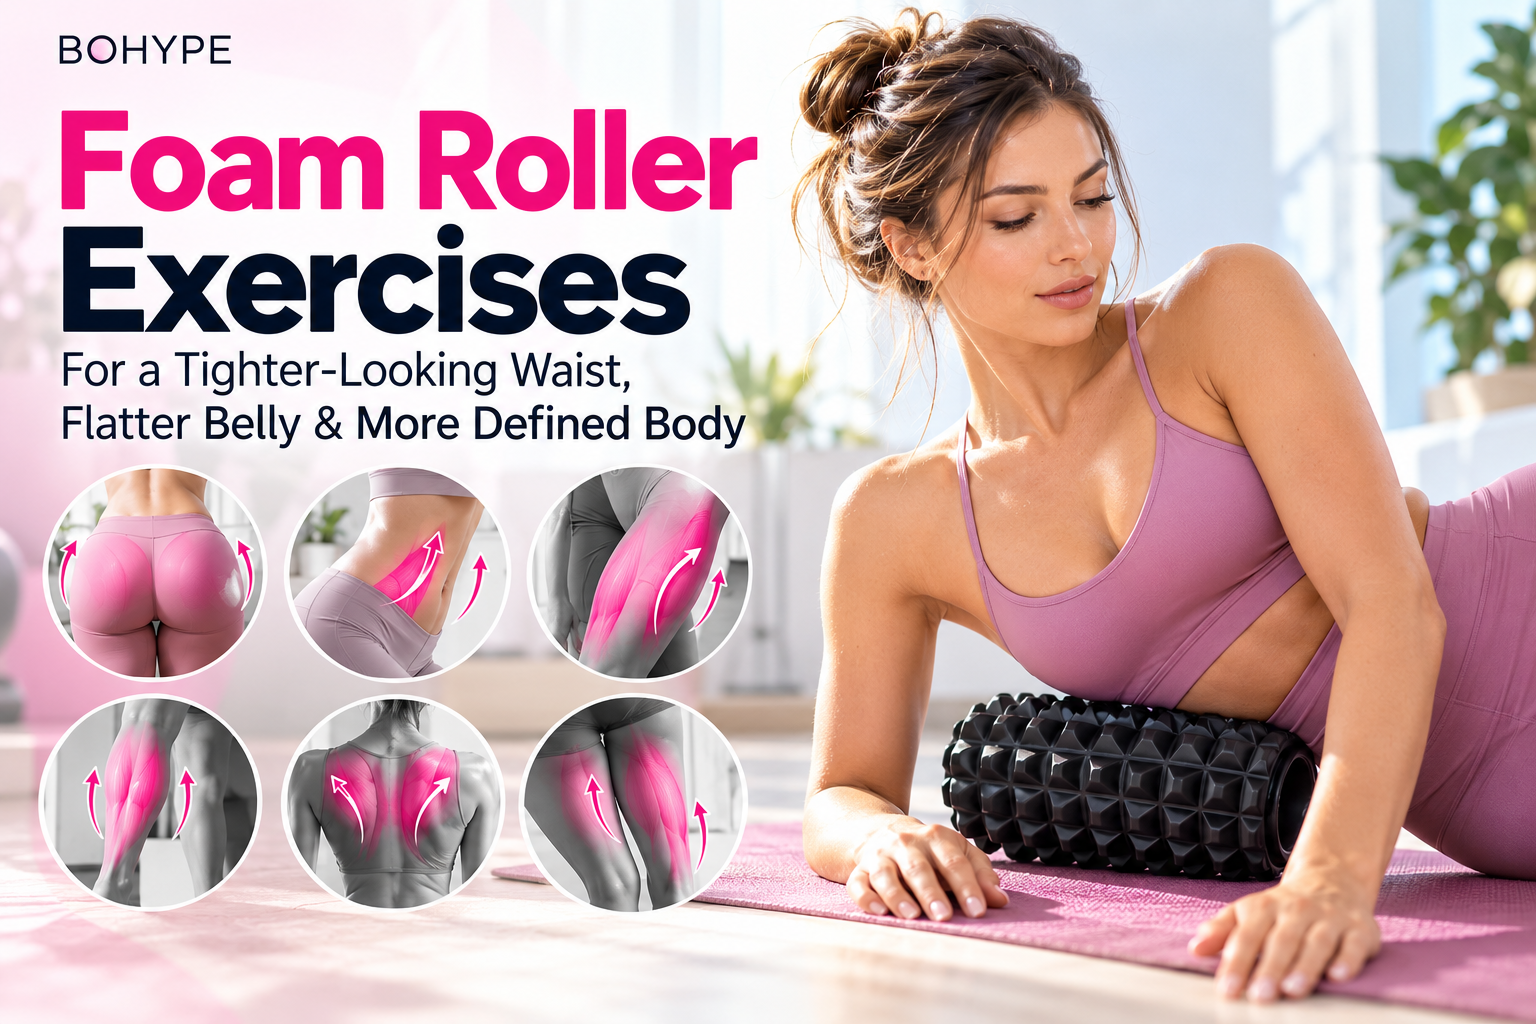
A textured foam roller like the one in the photo can be a surprisingly useful addition to your home workout routine. It combines self-massage, mobility work and gentle myofascial release — and when used alongside exercise and nutrition, it can help your body feel looser and more mobile.
But there is an important distinction: foam rolling does not directly burn belly fat or spot-reduce abdominal fat. What it can do is reduce muscular tension, improve mobility and make movement more comfortable. For a more defined waist, combine it with strength training, walking/cardio and an appropriate nutrition plan.
Why use a textured foam roller?
The raised surface gives you more points of contact than a smooth roller. Depending on how much pressure you apply, you can use it to work on:
- Tight muscles
- Glutes and hips
- Thighs
- Calves
- Upper back
- Side body
- Mobility around the hips and spine
- Post-workout muscle tension
Think of it as a recovery and mobility tool, rather than a fat-burning device.
10 Foam Roller Exercises to Try
1. Upper Back Roll
Lie on your back with the roller horizontally underneath your upper back.
Keep your knees bent and feet on the floor. Gently lift your hips and move slowly backwards and forwards.
30–60 seconds
This can be particularly useful if you spend a lot of time sitting at a computer.

2. Lower Back & Hip Mobility
For the lower back, don’t aggressively roll directly over the lumbar spine.
Instead, use the roller around the upper glutes and hips, keeping the movement controlled.
30–45 seconds
The goal is relaxation and mobility rather than intense pressure.

3. Glute Roll
Sit on the roller and shift your weight slightly onto one glute.
You can cross the opposite ankle over the knee to increase the stretch.
Move slowly through the glute area.
30–60 seconds per side

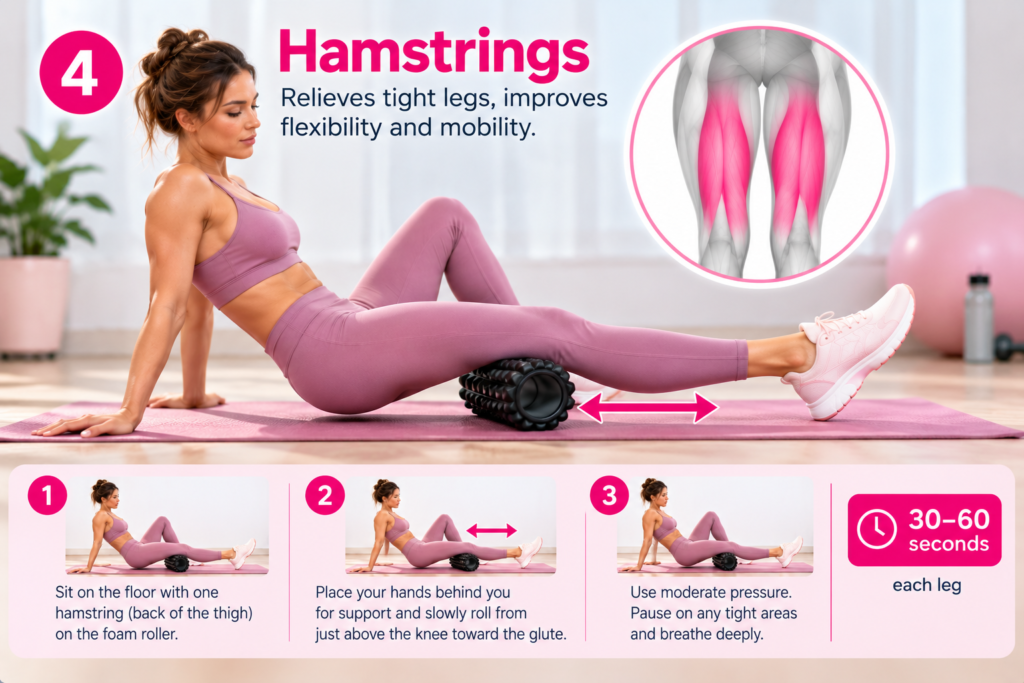
4. Hamstrings
Sit with one hamstring resting on the roller.
Place your hands behind you for support and slowly move from just above the knee toward the glute.
30–60 seconds per leg
5. Quadriceps
Lie face-down with the roller underneath your thighs.
Support yourself on your forearms and slowly move backwards and forwards.
30–60 seconds
This is particularly useful after squats, lunges or leg workouts.

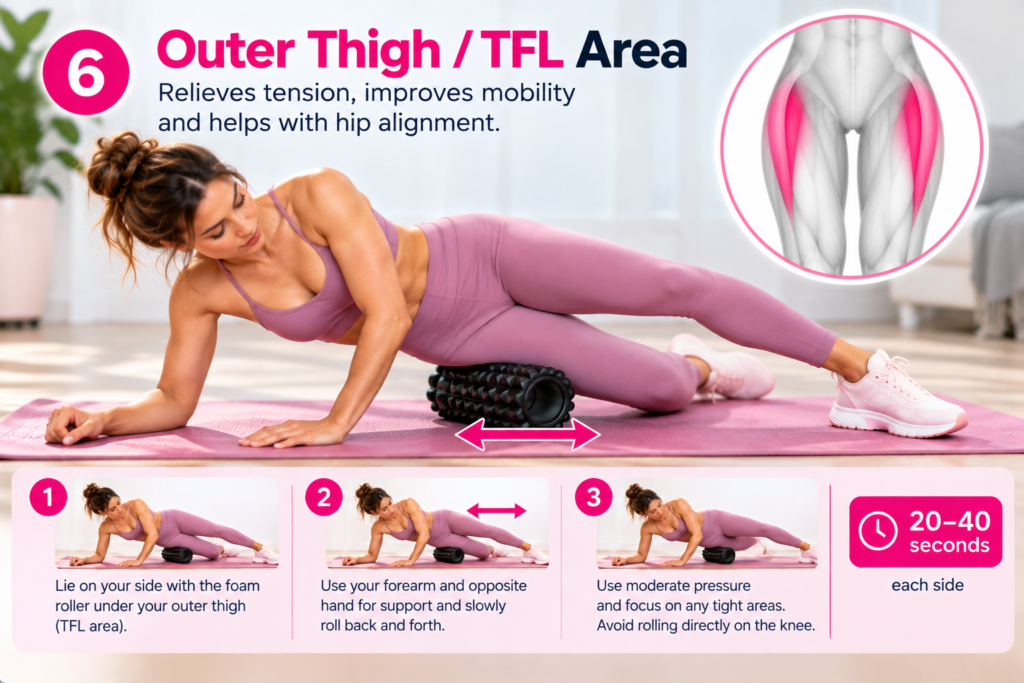
6. Outer Thigh / TFL Area
Lie on your side with the roller underneath the upper outer thigh.
Move slowly and use moderate pressure.
20–40 seconds per side
Avoid aggressively rolling directly along the outside of the knee.
7. Calves
Sit on the floor with the roller underneath one calf.
Lift your hips slightly and roll from the ankle toward the area below the knee.
30–60 seconds per leg
You can rotate your leg slightly inward and outward to reach different areas.

8. Inner Thighs
Position yourself so that the inner thigh rests over the roller.
Move slowly from the upper inner thigh toward the knee.
20–40 seconds per side
This can be useful for releasing tension after lower-body workouts.

9. Side Body & Waist
Lie on your side with the roller positioned around the side of the body, focusing more on the lat/side-body muscles and tissue around the hip rather than aggressively pressing into the ribs or abdomen.
Move slowly.
20–40 seconds per side
You may notice that the area feels more open afterward, particularly around the waist and hips.
Important:
A roller cannot selectively remove belly fat. If your waist measurement decreases, that comes primarily from changes in body fat, body composition and/or overall swelling/bloating — not from mechanically rolling the fat away.
The roller is best viewed as something that helps you move better and recover better, supporting the bigger picture.

10. Gentle Abdominal Work
This is the one I would approach differently.
Because your roller is heavily textured and relatively firm, I wouldn’t recommend aggressively rolling directly over your abdomen.
Instead, work around the surrounding areas:
Side body → hips → glutes → upper thighs
You can also use gentle mobility movements involving the torso without putting strong pressure on the abdominal organs.
If you experience pain, nausea, dizziness or unusual discomfort, stop.

A 10-Minute Waist & Body Routine
If your main goal is a flatter-looking stomach and more defined waist, try this sequence:
| Exercise | Time |
|---|---|
| Upper back | 60 sec |
| Glutes | 60 sec/side |
| Hamstrings | 45 sec/side |
| Quadriceps | 45 sec/side |
| Side body | 30 sec/side |
| Calves | 30 sec/side |
| Hip/outer thigh | 30 sec/side |
You don’t need to attack the roller with maximum pressure.
Slow + controlled + consistent is much more useful than painful.
Can foam rolling reduce cellulite?
It may temporarily change the appearance or feel of the skin and tissues because massage can influence fluid movement and tissue tension. However, there isn’t good evidence that foam rolling permanently eliminates cellulite.
For longer-term changes, the bigger factors are:
strength training + regular movement + nutrition + body composition + genetics.
Foam Rolling Before or After Exercise?
Before training
Use short, gentle rolling for areas that feel restricted.
Think:
30–60 seconds → move → exercise
After training
You can spend longer working on areas that feel tight.
Think:
slow rolling → relaxed breathing → mobility
You don’t need to spend 30 minutes doing it. Even 5–10 minutes can fit easily into a home routine.
The BoHype Takeaway
Your foam roller isn’t a magic cellulite remover or belly-fat burner — but it can be a very useful body-maintenance tool.
Use it to:
Release muscular tension
Improve mobility
Prepare your body for movement
Relax after training
Work on tight hips, thighs and glutes
Complement strength training and walking
And if your goal is specifically a smaller waist, don’t judge the roller by whether it makes your stomach look instantly flatter. Use it as one part of a bigger routine that includes movement, resistance training and nutrition.
Your roller works best as part of the whole system — not as the system itself.

